If you’ve got a house full of old, beat-up drawers from dressers, cabinets, or armoires that you’re just itching to toss—hold up a sec. I’ve been in the drawer box game for years, and let me tell you, turning those forgotten old drawers into brand-new, custom drawer boxes is way easier than you think. Plus, it’s way more sustainable than buying new, especially if you’ve got the raw materials laying around. I’m gonna walk you through every step, keep it real (no fancy jargon, promise), and even throw in some pro tips I’ve picked up as a drawer box supplier over the years. Drawer Box
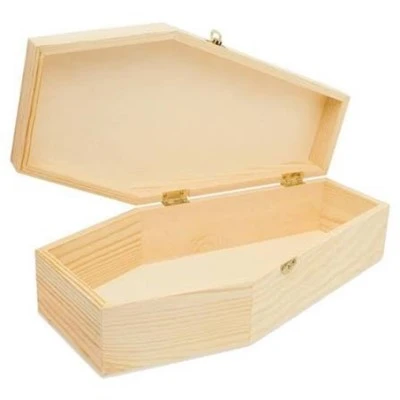
First off, let’s get the basics straight: what’s an old drawer actually made of? Most standard wooden drawers from the last 50 years are solid pine, maple, or even particleboard with a real wood veneer. The key here is to sort through your pile first. I’ve seen folks waste hours working with warped or water-damaged wood, so save yourself the hassle. Lay all your old drawers out on a flat surface (your garage floor works, just clear out the kid’s bike first) and check for three things: no big warps (if one edge is higher than the other by more than half an inch, it’s a goner), no soft spots from water damage or mold, and no major cracks that run all the way through the front or sides. Even a little scuff or a faded paint job? That’s totally fine—we can sand that later.
Next step: strip those drawers down. Most old drawers are held together with simple dovetail joints or even nails, so you don’t need fancy tools here. Grab a flathead screwdriver and a rubber mallet (or even a heavy hammer wrapped in a old t-shirt to avoid scratches) and gently tap the joints apart. If there are nails instead of dovetails, use a nail puller to work them out slow—don’t just yank, you’ll split the wood. Pro tip from me: keep all the small parts (the drawer slides, the little stops, even the old screws) in a labeled mason jar. A lot of people want to reuse slides for smaller projects, so you’ll thank yourself later for not losing ’em.
Once you’ve got all the pieces separated, it’s time to prep the wood. Let’s be real, old drawers usually have layers of paint, sticker gunk, or even old varnish built up. If you’re working with solid wood, a hand sander works, but if you don’t have one, a big block of sandpaper (80-grit first, then 120-grit, then 220-grit for a smooth finish) is totally fine. For the sticky stuff from old labels or price tags, a little rubbing alcohol on a rag works way better than scraping, and it won’t scratch the wood. If you’ve got particleboard drawers, go easy on the sanding—particleboard is porous, and you don’t want to wear too much away, just smooth out the rough edges.
Now, here’s the part where a lot of beginners mess up: cutting the wood to size. If you’re making a drawer box for a dresser or cabinet that’s already in your space, measure the opening first—way more important than measuring the old drawer. Most drawer openings are about a half-inch wider than the drawer should be, so add that gap to your measurements. For example, if your cabinet opening is 24 inches wide, 18 inches deep, and 4 inches tall, your new drawer box needs to be 23.5 inches wide, 17.5 inches deep, and 3.5 inches tall. I know, that sounds like a tiny detail, but trust me, nothing’s more frustrating than building a perfect box that doesn’t fit. If you don’t have a circular saw or table saw, you can totally get the wood cut at your local hardware store for like $5 a cut—way cheaper than buying a saw for one project.
Putting the new drawer box together is where you can get creative, but if you want it to last (no one wants a drawer that falls out mid-sock haul), stick to the basics. The best joint for a DIY drawer box is a simple butt joint with wood glue and pocket screws, and it’s way easier than dovetails for beginners. Drill a small pilot hole at an angle where the side pieces meet the front and back pieces, add a little wood glue, then sink the pocket screws in. If you want extra strength, you can add a little corner brace on the inside, but for most household uses, the glue and screws will do just fine. Wait 24 hours before you move it—let the glue set totally, no rushing here.
Once the box is together, it’s time to add the slides and the front. If you’re reusing old slides from your original drawers, just measure where they need to go on the inside of the drawer box and screw ’em in—easy peasy. If you don’t have old slides, don’t worry, you can buy cheap side-mount slides at any hardware store, and they’re designed to fit most standard cabinet openings. For the front of the drawer (that’s the part everyone sees, so make it look good), you can use the original drawer front if it’s in good shape, or cut a new piece from your prepped wood. If you’re painting it, a primer first, then two coats of your favorite color works, and if you’re staining it, make sure to wipe off the excess stain after 5 minutes so it doesn’t look blotchy.
Now, let’s talk about why this actually works (and why a lot of people skip to buying new when they don’t have to). As a drawer box supplier, I see so many people overpay for new drawer boxes when their old ones are just fine—they’re just a little beat up. Reusing old drawers cuts down on waste, saves you cash, and you can customize the size to fit exactly what you need, not some standard size that big box stores sell. I’ve had customers turn old armoire drawers into spice drawer boxes for their kitchen, turn dresser drawers into under-bed storage boxes, even make dog toy drawers out of old closet drawers. The possibilities are endless.
Wait, I should also mention a few common mistakes I see beginners make, so you don’t have to learn the hard way. First, don’t skip measuring the opening—like I said, so many people measure the old drawer and end up with a box that’s too big or too small. Second, don’t use too much sandpaper on particleboard— it’ll turn to dust, and your drawer will be wobbly. Third, if you’re using nails instead of screws, make sure to countersink them a little so they don’t scratch whatever’s inside the drawer. And fourth, if your old wood is super warped, don’t force it straight—sometimes it’s easier to use a flat, stable piece from a drawer that’s still good than to try to fix a warped one.
Another thing I love about this project is how customizable it is. Want a drawer box for a bathroom cabinet that’s extra shallow? You can cut your old drawer wood to exactly the height you need. Want a deep drawer for linens? Cut the sides a little longer. I’ve even had a customer turn an old dresser drawer into a drawer box for a craft table, with little dividers inside made from extra wood scraps. You can add small dividers if you want, just cut thin strips of wood and glue them inside the box—super easy, and perfect for storing pencils, makeup, socks, whatever.
Now, let’s circle back to being a drawer box supplier. A lot of people think we only make new drawer boxes, but we actually specialize in custom ones too—whether you’re renovating an old dresser, building a new cabinet, or just need a replacement drawer for a cabinet that’s seen better days. If you don’t have the time or tools to make your own old drawer into a new box, or if you need something bigger or more sturdy for a commercial project, we’ve got you covered. We work with all kinds of wood, including reclaimed wood from old drawers, so it’s still eco-friendly, and we can cut it to any size you need, no matter how specific.
If you’re in the middle of a home renovation, just need a replacement drawer, or have a pile of old drawers you want to turn into something useful, reach out to us. Whether you want to DIY your own or need a custom drawer box made to fit your space, we’re here to help. We know how annoying it is when a drawer breaks right when you need it, or your cabinets don’t have enough storage, and we’ve got the expertise to make something that works for you.
At the end of the day, turning old drawers into new drawer boxes is a win-win: you get a custom, functional piece for your home, you keep extra waste out of landfills, and you save money. Even if you’ve never done a woodworking project before, this is one of the easiest ones to start with—no fancy tools, no complicated steps, just a little patience and some old drawers lying around. Next time you’re cleaning out a garage or an old attic, don’t just toss those drawers—grab ’em, and try making your own drawer box. And if you need a little extra help, or want to skip the DIY step, we’re just a message away.
Solid Wood Triangular Strip References:
- American Wood Council. (2022). Reclaimed Wood: Environmental and Economic Benefits. Retrieved from woodadvisor.com
- DIY Network. (2021). How to Build a Drawer Box for Beginners. Retrieved from diynetwork.com
- National Kitchen and Bath Association. (2020). Standard Drawer Sizes for Residential Cabinets. Retrieved from nkba.org
- The Spruce. (2022). How to Refinish Old Drawers for Repurposing. Retrieved from thespruce.com
Dongming Xinang Wood Industry Co., Ltd.
Dongming Xinang Wood Industry Co., Ltd. is one of the most experienced drawer box manufacturers and suppliers in China, featured by quality products and good service. Please rest assured to buy CE approved drawer box made in China here from our factory. For price consultation, contact us.
Address: Zhangjie Village, Datun Town, Dongming County, Heze City, Shandong Province
E-mail: xinangwooden@163.com
WebSite: https://www.xinangwooden.com/
