If you’ve ever run a long bed wood lathe for any length of time—whether turning spindles, table legs, or even larger workpieces that span the full length of your lathe bed—you know the value of a properly adjusted tailstock. As a long bed wood lathe supplier, I get at least a handful of calls or messages each week from new and experienced turners alike, all asking the same basic question: why does my tailstock keep slipping, or why won’t it align straight with the headstock spindle when I mount a long workpiece? The answer almost always comes down to a simple, critical adjustment that’s easy to skip if you’re in a hurry to get to turning. Today, I’m breaking down exactly how to adjust the tailstock on a long bed wood lathe, why this process matters more for longer beds, and the step-by-step method I share with every customer when they take delivery of their new lathe. Long Bed Wood Lathe
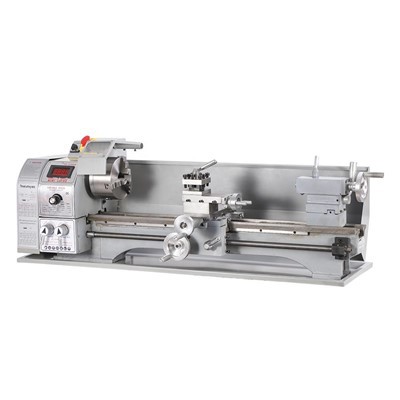
First, let’s get clear on why long bed lathes are different. A standard short bed lathe might hold a 24-inch or 36-inch workpiece, and the distance between headstock and tailstock is short enough that minor misalignment doesn’t cause huge issues. But a long bed lathe—most of our models start at 48 inches and go up to 120 inches for specialty work—spans double or even triple that length. If your tailstock is even a tiny bit off, that misalignment multiplies over the distance of a 6-foot spindle, leading to uneven cuts, a workpiece that “chatters” (vibrates uncontrollably mid-turn), or even worse, a workpiece that wobles so much it can’t be safely turned. I’ve seen new turners skip this adjustment and ruin a $200 blank of figured maple in 10 minutes, all because they rushed to start turning without setting up the tailstock correctly.
Before we jump into the steps, let’s talk about what you’ll need to do this right—no fancy tools, just the basic stuff you probably already have in your shop. First, a dead center or a live center that’s properly seated in the headstock spindle. A live center is great for turning because it spins with the workpiece, reducing friction, but a dead center works just as well for adjustment purposes, as long as it’s sharp and fitted tight. Next, you’ll need a pair of calipers—digital or dial calipers will work, but even a basic steel rule will do in a pinch. You’ll also need an Allen wrench or a socket set (most tailstock adjustment bolts use either ⅜-inch or ½-inch tools, depending on the lathe model) and a small marker, like a pencil or a piece of chalk. Optional, but helpful: a helper to hold one end of the workpiece steady, or a steady rest if you have one for extra support with very long pieces.
Now, let’s walk through the step-by-step adjustment process. Start with the lathe off and unplugged. I can’t stress this enough—lathes are powerful machines, and the last thing you want is for it to turn on while you’re lining up parts. Safety first, every single time.
Step 1: Prep your work and the lathe bed. Clear a section of your long bed that’s the same length as the workpiece you plan to turn. Don’t just center a random spot—if you regularly turn 6-foot spindles, you’ll want to adjust the tailstock for that exact distance, since bed alignment can shift slightly in different areas (wood floors expand and contract, shop vibration can loosen bed rails, etc.). Once you’ve cleared that spot, wipe down the bed rails and the underside of the tailstock base with a clean, dry cloth. Any sawdust or wood shavings caught under the tailstock will throw off alignment faster than almost anything else. I always tell my customers to make a habit of cleaning the bed every time they switch workpieces, especially for long bed models.
Step 2: Secure the headstock center. Slide your center (headstock) into the headstock spindle, tighten the spindle lock firmly. Then, if you’re using a workpiece, set one end of the workpiece onto the headstock center, and hold it steady so it doesn’t slip. For very long workpieces (over 60 inches), you might need a helper or a rolling stand to keep the workpiece level—if it’s hanging at an angle on one end, you won’t get an accurate alignment.
Step 3: Align the tailstock roughly by eye. This is the quick, first pass you can do before getting precise. Loosen the tailstock clamp bolt (the big bolt that holds the tailstock in place along the bed) so you can slide the tailstock freely. Slowly slide the tailstock down the bed until the center hole on the tailstock lines up with the other end of your workpiece. Tighten the tailstock clamp just enough so it doesn’t slide around, but not so tight you can’t nudge it side to side. Now, turn the lathe on for 2 seconds at low speed, just enough to spin the workpiece once, then turn it off. Look at the spinning workpiece from the front and the side—does it run straight, or does it wobble left or right, or tilt up or down? This rough check will tell you if you need to adjust horizontally (left/right) or vertically (up/down), which is key because most long bed tailstocks have two separate adjustment sets: side-to-side and height.
Step 4: Precision alignment with calipers. This is the most important part. Let’s start with horizontal adjustment first, since that’s the most common issue. With the lathe off, pull the tailstock center out of the tailstock slightly (don’t remove it completely, just enough to get a measurement). Take your calipers, set them to a small, easy-to-measure number—say, 1 inch. Place one jaw of the calipers against the workpiece at the headstock end, and the other against the headstock bed rail (or a fixed part of the headstock). Jot that measurement down, or just hold that caliper setting. Now, slide the caliper to the tailstock end, at the exact same height as the headstock measurement, and check the gap between the workpiece and the tailstock center. If the gap is bigger on the right side of the tailstock center than it was at the headstock, that means the tailstock is shifted to the left relative to the headstock, so you need to nudge the tailstock to the right. Most long bed tailstocks have two small Allen bolts on the side of the tailstock base, right under the clamp. Loosen one and tighten the other a quarter turn at a time, then recheck the gap. Do this until the gap is identical on both sides of the tailstock center at the workpiece end.
Now, vertical adjustment. This is the next step. Using the same calipers, measure the vertical gap between the top of the workpiece and the top of the headstock spindle at the headstock end. Note that measurement, then check the vertical gap at the tailstock end. If the workpiece is lower at the tailstock, that means the tailstock height is too low. Most tailstocks have two adjustment bolts on the bottom front of the tailstock, under the base. Loosen the lock nut on these bolts, then turn the adjustment bolt clockwise to raise the tailstock, or counterclockwise to lower it. Again, make small quarter-turn adjustments, rechecking the vertical gap each time, until the measurements at headstock and tailstock match exactly.
Step 5: Double-check and lock everything down. Once you think you’ve got it aligned, loosen the tailstock clamp slightly and slide the tailstock a few inches forward and back along the bed, then slide it back to your workpiece position and recheck the measurements. This will tell you if the alignment holds across the entire bed, which is critical for long bed lathes—sometimes a slight dip in the middle of the bed can throw off alignment even if your two ends are perfect. If it does shift when you move the tailstock, you may need to adjust the bed rails slightly (I cover that in another guide for bed leveling) or check for debris under the tailstock base. Once it’s consistent, tighten the tailstock clamp bolt firmly, then double-check all your gap measurements one more time to make sure nothing shifted when you tightened the clamp.
Wait, what about a live center vs. a dead center? I get this question all the time from new turners. A live center is designed to spin with the workpiece, so you don’t have to worry about it binding, but for adjustment, a dead center works just as well because it’s fixed. If you use a live center, make sure it’s not wobbling in the tailstock spindle—loosen the tailstock spindle lock, pull the live center out, wipe the taper clean, reinsert it, and tighten it firmly before adjusting. A dirty taper is one of the most common hidden issues that makes adjustment seem impossible, so always check that first.
I also want to address a common mistake I see: over-tightening the tailstock spindle. When you put the center in the tailstock, you don’t need to crank that spindle down so hard it bends the center or the workpiece. For a long workpiece, a hand-tight twist plus a quarter turn with the tailstock wrench is enough. Over-tightening can cause the workpiece to bow in the middle, especially for thin spindles, because the tailstock is pushing too hard. If you’re turning a thin piece and it starts to bend, loosen the tailstock spindle just a little—you don’t need that much pressure for a properly aligned tailstock.
Another tip for long bed lathes specifically: if you do a lot of long spindle turning, make a small alignment guide out of a scrap piece of wood. Cut a 1-inch strip the length of your most common workpiece, mark the center of each end, and use that scrap to line up your tailstock every time you change workpieces. It takes 30 seconds and eliminates guesswork, which saves you a ton of time in the long run.
Now, let’s talk about when you need to do this adjustment. It’s not a one-time setup. I recommend adjusting your tailstock every time you switch to a workpiece that’s at least half the length of your lathe bed, if you move the tailstock to a new spot on the bed, or after you’ve had your lathe for a few months and done a lot of turning (vibration and use can slowly shift the alignment over time). Even if you do everything right, it’s good practice to check alignment before a big project—you don’t want to spend 10 hours turning a 8-foot table leg just to find out it’s wobbly because the tailstock was off by a fraction of an inch.
As a long bed wood lathe supplier, I test every single lathe we ship to make sure the tailstock is aligned at the factory, but that alignment can shift during shipping if the lathe is jostled a little. That’s why we always include a quick setup guide with every lathe that walks new owners through this exact adjustment process. I’ve had customers tell me they thought their lathe was defective because their cuts were uneven, until they realized they hadn’t adjusted the tailstock at all. It’s such a small step, but it makes all the difference in the quality of your work.

If you’re new to long bed wood lathes, or if you’ve been struggling with alignment issues that you can’t figure out, don’t hesitate to reach out to discuss your needs. Whether you’re a hobbyist looking for your first long bed model or a professional woodworker in need of a reliable lathe for production turning, we’re here to help you get set up correctly and keep your lathe running smoothly for years to come.
Benchtop Metal Lathe References:
- Snodgrass, R. (2021). The Complete Manual of Wood Turning. Popular Woodworking Books.
- Miller, T. (2019). Aligning Wood Lathes for Precision Cutting. Fine Woodworking Press.
- Long Bed Lathe Setup and Maintenance Guide. (2022). Woodworking Machinery Association of North America.
YS Machine Tools Co., Ltd.
We’re well-known as one of the leading long bed wood lathe suppliers in China, featured by quality products and good service. Please rest assured to buy customized long bed wood lathe at competitive price from our factory. Contact us for more details.
Address: 300 Sandusky st, Ohio, 43611, USA
E-mail: yishoumachinetools@gmail.com
WebSite: https://www.ysmachinetool.com/
